ReadyView
-
What is ReadyView?
ReadyView is a powerful network management tool provided by ReadyLinks, designed to offer a comprehensive and user-friendly interface for monitoring, configuring, and managing your network infrastructure. Whether you are an IT professional managing a large-scale network or a small business owner ensuring smooth operations, ReadyView provides the tools you need to maintain a robust and efficient network.
Key Features:
-
Dashboard Overview:
- Real-Time Monitoring: Access a real-time overview of your network's status, including device health, connectivity, and performance metrics.
- Customizable Views: Tailor the dashboard to display the most relevant information for your network management needs.
-
Device Management:
- Add/Remove Devices: Easily add new ReadyLinks devices to your network or remove existing ones.
- Configuration Management: Retrieve and update device configurations, including network settings, VLANs, QoS policies, and security protocols.
- Firmware Updates: Check for and apply the latest firmware updates to ensure devices are running the most current and secure software versions.
-
Network Configuration:
- Templates: Create and apply configuration templates to multiple devices simultaneously, ensuring consistent settings across your network.
- Policy Enforcement: Implement and enforce network policies to maintain security and performance standards.
- Map View: Visualize device locations on a network map to optimize placement and troubleshoot connectivity issues.
-
Alerts and Notifications:
- Custom Alerts: Set up alerts for various network events, such as device disconnections or performance issues.
- Notifications: Receive notifications via email or SMS to stay informed about critical network events.
-
Reporting and Analytics:
- Detailed Reports: Generate comprehensive reports on network usage, performance, and security.
- Historical Data Analysis: Analyze historical data to identify trends and make informed decisions to optimize network performance.
-
User Management:
- Role-Based Access: Manage user roles and permissions to ensure secure access to network management features.
- Authentication Integration: Integrate with existing authentication systems for streamlined and secure user access.
Benefits:
-
Improved Network Visibility:
- Gain deep insights into your network's performance and health, enabling proactive management and troubleshooting.
-
Simplified Device Management:
- Centralize the management of all ReadyLinks devices, reducing the complexity of network administration.
-
Enhanced Security:
- Implement robust security measures and monitor network activities to protect against threats.
-
Scalability:
- Easily scale your network management capabilities as your organization grows, with support for a large number of devices.
Use Cases:
-
Enterprise Networks:
- Manage large-scale enterprise networks with ease, ensuring optimal performance and security across numerous devices.
-
Service Providers:
- Provide efficient network management services to clients, maintaining high standards of reliability and performance.
-
Small to Medium Businesses:
- Streamline network management processes, enabling small and medium businesses to focus on their core operations.
Getting Started:
To get started with ReadyView, visit the ReadyView Documentation for detailed information on setup, configuration, and usage. The documentation provides comprehensive guides and reference materials to help you leverage ReadyView for effective network management.
Support:
For additional assistance, visit our Support section or contact our Support Team for personalized help and guidance on using ReadyView.
ReadyView is your go-to solution for efficient and effective network management, providing the tools and insights you need to maintain a high-performing and secure network environment.
-
Dashboard Overview:
-
Create a network
Networks are used to geolocate and contain your devices and their configurations. You may create networks prior to receiving ReadyLinks devices.
Log in to ReadyView .
Navigate to the Networks tab in ReadyView and press the + button
Enter the address of the network
Confirm address and other network details
Press Create Network
By default the name of the network is the address selected when the network was created. To change the name.
In the ReadyView dashboard select the network to rename
Go to settings -> General
Add a new name, description, and contact to the network
Press save changes
-
Roles and Permissions in ReadyView
With ReadyView, you can add role-based access to limit what ReadyView users have access to. This can vary from who can view which networks in an organization to who can reboot a switch. This article walks you through creating and assigning roles and permissions within ReadyView.
Things to note:
By default, all users are placed into the Everyone role. Like any other role, you can change what it has access to — by default, every permission is enabled.
Users can be added to multiple roles. If a user belongs to two roles where one has a permission disabled and another has it enabled, the user will ultimately have access — the most permissive setting wins.
Creating Roles:
- Navigate to: Administration -> Organization -> Roles
- Press the + button to create a new role
- Enter a name for the role you wish to create
- Go through and add the appropriate permissions
- Once completed press Save
Assigning Roles to Users:
- Navigate to: Administration -> Organization -> Roles
- On the role you would like to add users to, press the add user button
- Then press the + button
- Select users and then press Save
- Next press the Close button
Limiting what Roles have access to what networks:
- Navigate to the network you wish to limit access by a role
- Go to Settings -> Admins & Users
- Select the toggle to make the network private
- Press Add Roles
- Select the role you want to have access to the network
- Press the Save Button
- And finally press the Save button at the very bottom
-
Manage VLANs in ReadyView
Creating VLANs through the ReadyView dashboard automatically syncs them across all devices on the network, eliminating the need to manually configure VLANs on individual switches. With our GL-EP series switches, you can even assign an RGB value to each VLAN ID for easy visual identification.
VLAN creation is done at the network level in ReadyView
Create a new VLAN:
- Navigate to the network you wish to make VLANs for
- Go to Settings -> Networks
- Press New Virtual Network
- Fill out the VLAN name, VLAN, ID, and optionally the LED color
- Press Add Virtual Network
Edit existing VLANs:
- Navigate to the network that has the VLAN you want to edit
- Go to Settings -> Networks
- Click on the VLAN you want to edit
- Make desired changes and press Update
Deleting VLANs:
- Navigate to the network that has the VLAN you want to delete
- Go to Settings -> Networks
- Click on the VLAN you want to delete
- Press Remove
-
Claiming devices
Log in to ReadyView using the account created earlier. Navigate to the Add Device page and select the button to add a device or multiple devices. Provide the MAC address of your device/s. Enter a comma separated series of MAC addresses or scan the MAC QR code on your device.
Select Claim to claim the device.

Congratulations! You've successfully claimed your ReadyLinks device.
Troubleshoot: Once the device is powered on and connected, it could take a few minutes for the device to connect back to the ReadyLinks cloud. If you are still having trouble claiming your device. Ensure the device is on a network with proper firewall rules configured.
-
Configuration templates
Configuration templates designed to simplify and streamline the setup and management of multiple network devices. These templates allow you to define standardized settings and apply them across your network, ensuring consistency and reducing manual configuration efforts.
Key Features:
-
Template Creation:
- Create custom configuration templates tailored to your network's specific needs.
- Define settings for VLANs, IP addresses, QoS policies, security protocols, and more.
- Save templates for reuse, making it easy to apply consistent configurations to new devices.
-
Template Management:
- Organize and manage multiple templates within the ReadyView interface.
- Edit existing templates to update configurations as your network requirements evolve.
- Duplicate templates to create variations for different segments of your network.
-
Bulk Application:
- Apply configuration templates to multiple devices simultaneously, saving time and effort.
- Select devices individually or use filters to apply templates to groups of devices based on specific criteria.
- Schedule template applications to occur during maintenance windows, minimizing disruption to network operations.
-
Template Versioning:
- Maintain versions of your templates to track changes and ensure rollback capabilities if needed.
- Compare different versions to understand the impact of configuration changes over time.
-
Compliance and Standardization:
- Ensure compliance with organizational policies by enforcing standardized configurations across your network.
- Reduce the risk of misconfigurations and enhance network reliability through consistent device settings.
Benefits:
-
Efficiency:
- Streamline the deployment and management of network devices by reducing manual configuration tasks.
- Quickly onboard new devices by applying pre-defined templates, speeding up the installation process.
-
Consistency:
- Achieve uniform configurations across all devices, ensuring a stable and predictable network environment.
- Minimize configuration errors and discrepancies that can lead to network issues.
-
Scalability:
- Easily scale your network by applying templates to new devices as they are added, maintaining consistent settings across your infrastructure.
- Adapt templates to accommodate network growth and changing requirements.
-
Flexibility:
- Customize templates to suit different segments of your network, allowing for tailored configurations based on specific needs.
- Update templates to reflect evolving best practices and technological advancements.
Use Cases:
-
New Device Onboarding:
- Simplify the process of adding new devices to your network by applying pre-configured templates, ensuring they are correctly configured from the start.
-
Network Upgrades:
- Apply updated templates to devices during network upgrades to ensure all settings are aligned with the latest standards and requirements.
-
Policy Enforcement:
- Use templates to enforce security policies, QoS settings, and other critical configurations across your network, enhancing overall compliance and performance.
Configuration templates in ReadyView provide a robust solution for managing network settings efficiently and consistently. For detailed instructions on creating and using templates, refer to the ReadyLinks documentation page.
-
-
Create a template
Follow the steps below in ReadyView to create your first configuration template. This template will then be used as the base configuration for all of the devices bound to it.
- Navigate to Settings > Configuration templates
- Click Create a new template
- You can choose to create a New template or Clone an existing template
- Provide a Template name
- Click Save
Once a template has been created you can bind it to a device to update the device's base configuration.
To bind a device to a template:- Click into the device
- Select the configuration template to bind
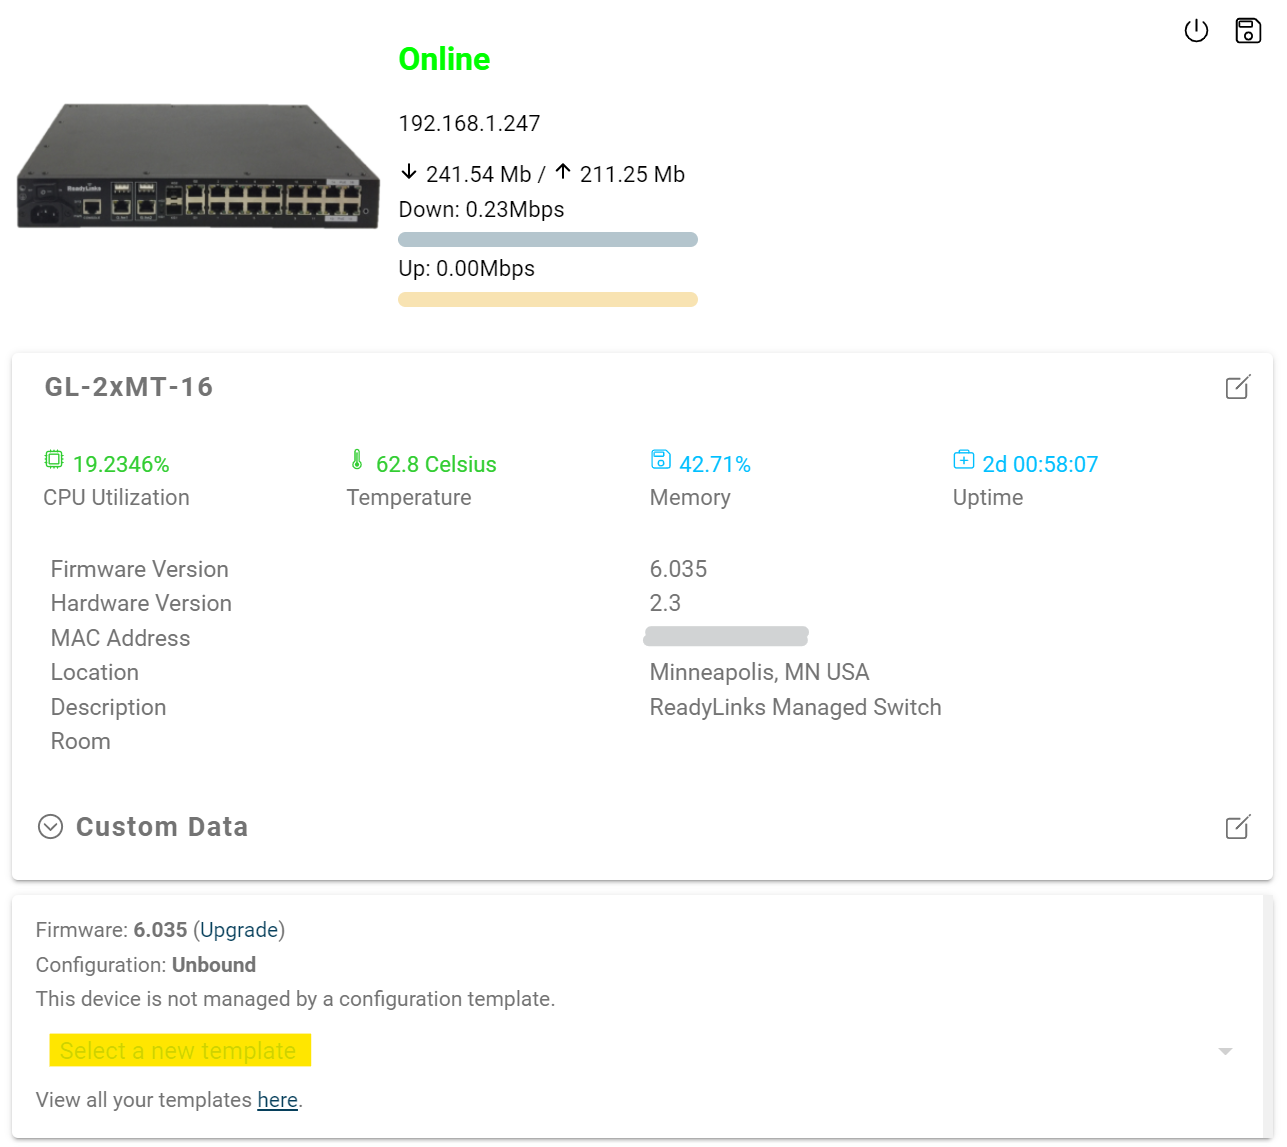
- Click Confirm
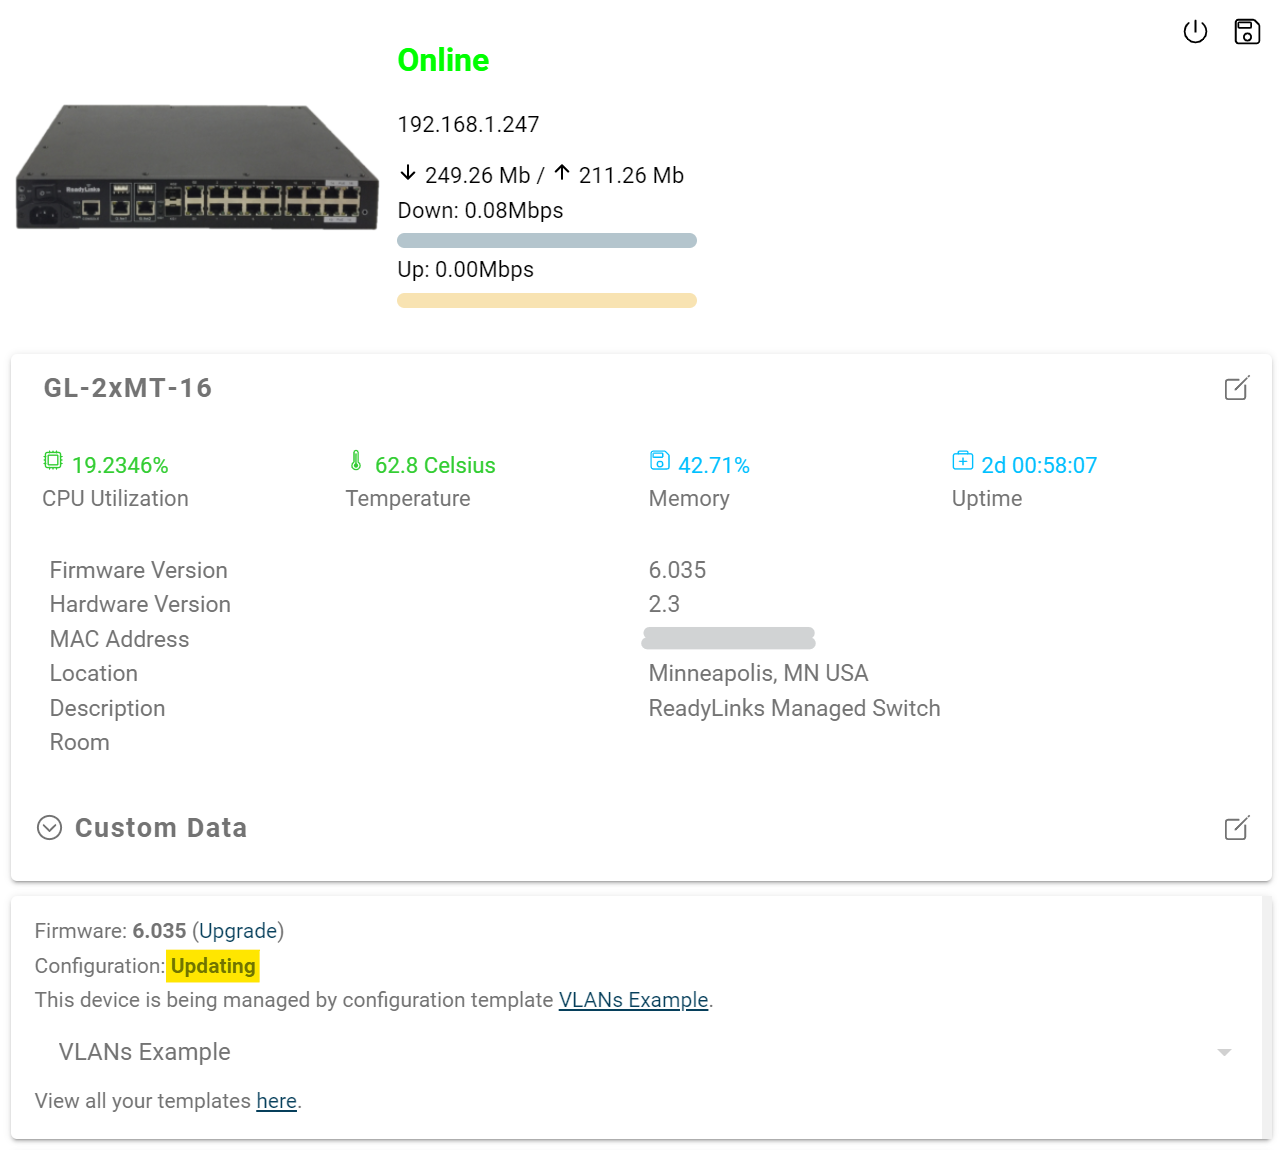
As the device is being provisioned it will show a configuration status of Updating.
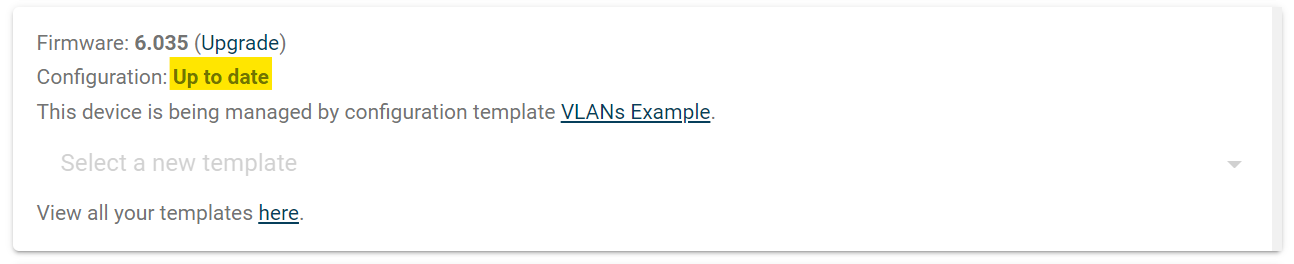
Once the template binds to the device, it will show a configuration status of Up to date.
If the provisioning fails or one of the configurations causes the device to lose connection to the Internet, it will show a configuration status of Out of sync. You can always try to reapply the template, but if a configuration in the template causes the device to go offline, you will need to reboot the device to restore it to the previous running configuration.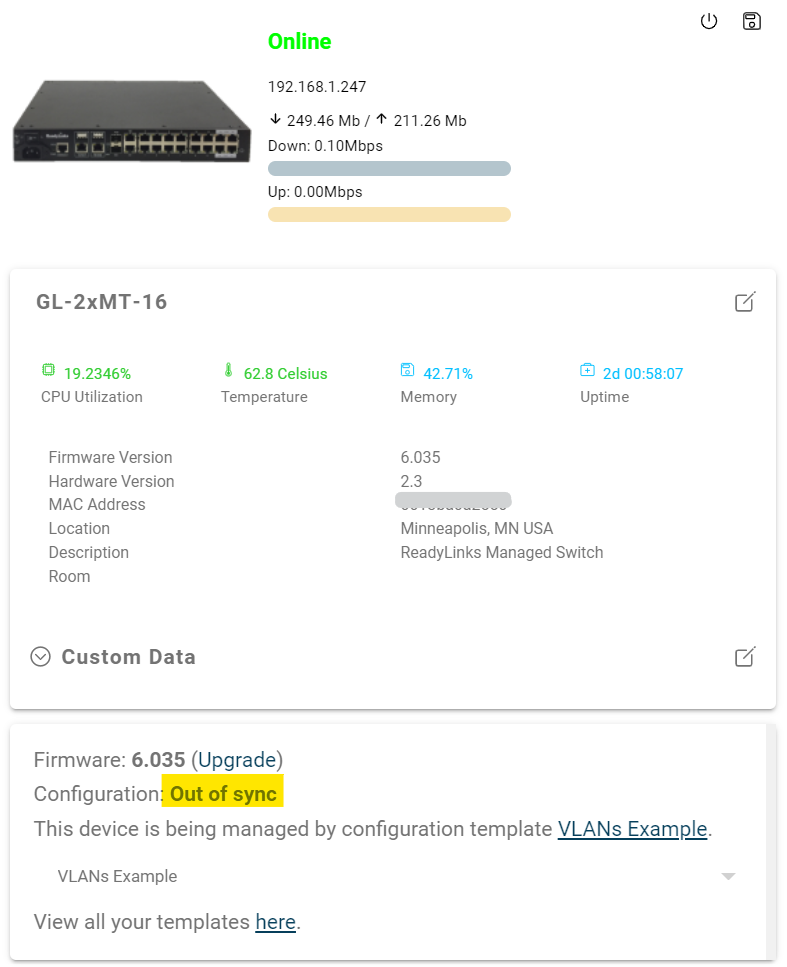
-
Firmware upgrades
Now that you have your device claimed, you will want to upgrade it to the latest firmware version. Click into the device tab of your device page, select the upgrade now button, and choose the latest version. A firmware upgrade takes about 6-8 minutes, do not power off the device for the duration of the upgrade, the device will reboot when the upgrade is complete. You can view the status of the upgrade at any time under the device tab.
-
Device Tags
Device tags are custom labels that help you organize and quickly identify devices across your network. By tagging devices, you can group them by location, function, department, or any other criteria relevant to your organization. Tags make it easier to filter, search, and manage large numbers of devices from the ReadyView dashboard. Tags can be added to all ReadyLinks devices that are managed via ReadyView.
Tags are created at the network levelTo make a new tag:
- In ReadyView navigate to the network you wish to create tags for
- Go into the Wired or Clients tab
- In left pannel select New Tag
- Enter the name of the tag and press Add
To add a tag to a device:
- Select the Switch/Clients to add the tags to
- In the bottom tool bar press Config -> Tags
- Select the tags to add
- Press Add
-
ReadyLinks Switch Showing Offline in ReadyView
If your ReadyLinks switch is not showing online in ReadyView, work through the checks below in order. Most offline issues are caused by basic network connectivity, time sync, or DNS problems — confirming each item below will resolve the majority of cases.
Overview of checks
- Check the ReadyView connection on the switch via console/Telnet/SSH
- Verify the switch has a valid IP address
- Verify DNS server configuration
- Verify the switch's local time
- Verify firewall configuration
1. Check the ReadyView connection on the switch
Connect to the switch via console, Telnet, or SSH and run the following command to view its ReadyView connection status:
GL-8xCH# show readyview connection all
--------- ReadyView Connection Information ---------
rlicloud_443
ReadyView Status: On
Connection Status: Connected
Authentication Method: Password
ReadyView File Status: Exists
--------- ReadyView Connection Information ---------
cloud_rl_io_443
ReadyView Status: On
Connection Status: Connected
Authentication Method: Password
ReadyView File Status: Exists
What to look for:
-
Connection Status: Connected — the switch is successfully connected to ReadyView. If the switch still does not appear online in the ReadyView dashboard, contact our support team for further assistance.
- If you removed the default superuser account or changed its password on the switch and its showing connected via the CLI command, but not in ReadyView please review this guide: Changing the Default Password on ReadyLinks Switches
- Connection Status: Not Connected — continue to the next troubleshooting steps below.
2. Verify the switch has a valid IP address
The switch needs a routable IP on its management VLAN before it can reach ReadyView. Run the following command to confirm:
GL-8xCH# show vlan interface
VLAN INTERFACE    TYPE    IPv4 ADDRESS/NETMASK/GATEWAY            SECONDARY IP    IPv6
----------------------------------------------------------------------------------------
VLAN-INTERFACE32  DHCP    10.10.32.11/255.255.255.0/10.10.32.1
What to look for:
- A valid IPv4 address, netmask, and default gateway should be listed for your management VLAN.
- If no IP address is listed, configure a VLAN interface with either a DHCP-assigned or static IP address.
- If using DHCP, verify the switch received a lease and that no IP conflict exists on the network.
How to configure a management VLAN and IP
Use the following commands to create a management VLAN, tag it on an uplink interface, and assign an IP address to the VLAN interface. Replace
<vlan id>, the uplink port, and the IP details as appropriate for your environment. Valid port names includeGhn1–Ghn24,Fiber/G1,Fiber/G2,RJ45/G1, andRJ45/G2.Static IP:
configure terminal
vlan <vlan id>
name management
switchport tagged ethernet <uplink port>
end
int vlan <vlan id>
ip address <ip-address> <netmask> <gateway>
DHCP:
configure terminal
vlan <vlan id>
name management
switchport tagged ethernet <uplink port>
end
int vlan <vlan id>
ip address dhcp
3. Verify DNS server configuration
ReadyView is reached by hostname, so DNS resolution must be working. Run the following command to check your DNS configuration:
GL-8xCH# show dns
Dynamic DNS mode
nameserver 8.8.8.8
nameserver 1.1.1.1
Notes:
- If the switch is using DHCP, DNS servers are typically pushed automatically.
- If the switch is configured with a static IP address, you will need to set DNS servers manually.
Test DNS resolution against the ReadyView cloud hostname using
traceroute:GL-8xCH# traceroute cloud.readylinks.io traceroute to cloud.readylinks.io (168.61.23.187), 30 hops max, 38 byte packets
What to look for:
- The hostname
cloud.readylinks.ioshould resolve to an IP address (shown in parentheses at the start of the output). - If the traceroute is unable to resolve the hostname, review your DNS server configuration and confirm the configured nameservers are reachable.
How to manually configure DNS servers
If the switch is using a static IP address (or DHCP is not providing DNS), set the nameservers manually. Replace
x.x.x.xwith your primary and secondary DNS server addresses.configure terminal dns nameserver1 x.x.x.x nameserver2 x.x.x.x
4. Verify the switch's local time
Cloud services validate TLS certificates against the current time. A switch with an incorrect date or time will fail to establish a secure connection to ReadyView and appear offline. Run the following command to check the switch's local time:
GL-8xCH# show clock
Local Time:
        Tue  May  26  14:27:19  2026
What to look for:
- The displayed time should match the current local time (within a few minutes).
- If the time is incorrect, configure NTP on the switch. As a quick connectivity test, you can also verify the switch can reach
time.google.com.
How to configure NTP (SNTP)
The following command points the switch at Google's public time server. Adjust the zone and time offsets if your switch should display local time instead of UTC.
configure terminal
sntp client server-address time.google.com response-time 3 zone-offset <GMT #> time-offset 0
5. Verify firewall configuration
Ensure your firewall is configured to allow the following traffic through:
Source Destination Port Protocol Direction Description ReadyLinks switch rlicloud.com, cloud.readylinks.io 443 TCP Outbound ReadyView cloud communication ReadyLinks switch time.google.com 123 UDP Outbound NTP time synchronization Still stuck?
Please reach out to our ReadyLinks support specialists for further assistance.
-
Changing the Default Password on ReadyLinks Switches
This article walks you through changing the default password on ReadyLinks devices. Default passwords are publicly known — all ReadyLinks devices ship with the default login of superuser/123. Changing the default password is best practice for running a secure network. Because the superuser account is also used to connect to ReadyView, ReadyLinks' cloud-managed network monitoring platform, there are a few extra steps involved to ensure everything stays in sync.
Note: If you do not add the TACACS servers and create your new account before removing the superuser account, the switch will be unable to connect to ReadyView — no monitoring or configuration changes will be possible through the dashboard. Note that
show readyview connection allreflects the HTTP connection the switch can establish to ReadyView, not its manageability through the dashboard. The switch may appear connected locally while showing offline in ReadyView.Completing this also requires changing the login method for the HTTP web GUI to the TACACS servers, due to this you will be unable to login to the web GUI using the account you created. You still can however access the web GUI of the switch via ReadyView.
Overview
- Add TACACS servers
- Add your new account
- Remove the superuser account
- Save changes
- Check the ReadyView dashboard
1. Add TACACS Servers
configure terminal
show readyview connection all
aaa authentication login http tacacs
tacacs-server host 10.13.0.20 port 49 key FYjJ8XCeJPWFvpwTIdIN timeout 5
tacacs-server host 10.13.0.16 port 49 key FYjJ8XCeJPWFvpwTIdIN timeout 5
tacacs-server host 10.13.0.24 port 49 key FYjJ8XCeJPWFvpwTIdIN timeout 5
tacacs-server host 10.13.0.23 port 49 key FYjJ8XCeJPWFvpwTIdIN timeout 5
2. Add Your New Account
configure terminal
username <new_username> password <password> mode cipher privilege admin
3. Remove the Superuser Account
configure terminal
no username superuser
4. Save the configuration changes
write5. Check the ReadyView Dashboard
Once all of the above is completed you added the TACACS servers, added your new account, and removed the default superuser account, you should now see your switch online in ReadyView.
Still stuck?
Please reach out to our ReadyLinks support specialists for further assistance.