This guide provides instructions on how to deploy ReadyLinks devices. The cloud architecture provides an incredibly powerful sandbox and staging area without the need to ever unbox a single piece of hardware. This is mainly due to the fact that configuration changes and staging lives in the cloud until the device it is destined for checks in. This provides a broad array of new opportunities for streamlining new switch deployments as well as switch refreshes.
Before you begin
Login to ReadyView. If this is your first time, create a new account. Verify the firewall rules allow for the devices to communicate with your dashboard. Devices can be brought online and pre-provisioned prior to installation or pull their configuration at the time of installation. Create a configuration template for each ReadyLinks device model and automatically apply the template to devices as they come online and are adopted into your organization.
Bringing devices online
Here's how to bring your device online for the first time:
- Unbox your ReadyLinks device and power it on
- Assign an IP address to the ReadyLinks device
- Claim your device to your ReadyView dashboard
Note: You will need an uplink to the Internet for your devices with valid upstream firewall rules configured so they can talk to the ReadyLinks cloud.
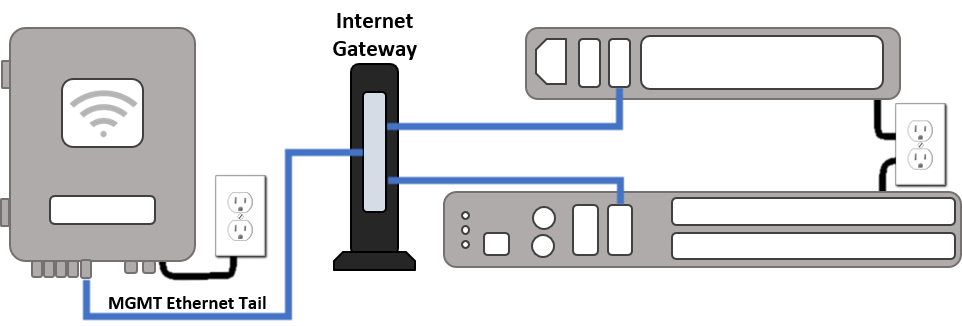

Each ReadyLinks device comes with a standard Ethernet uplink (WAN) facing port. Plug this port into your Internet gateway and follow the steps below to claim and manage your device.