Best practices
-
Best Practices for ReadyLinks Firmware
Introduction to ReadyLinks Firmware
ReadyLinks takes pride in providing robust networking and IT solutions that are simple to manage and highly effective. This commitment extends to firmware management on ReadyLinks devices. Traditionally, firmware updates are seen as tedious, time-consuming, and fraught with risk, often a source of frustration for network administrators. However, ReadyLinks strives to ease this burden. The industry has long struggled with the complexities of firmware management, leading to countless horror stories of failed upgrades due to corrupted files or late-night troubleshooting in data centers. ReadyLinks aims to streamline and simplify these processes.
Simplified Firmware Updates
In the early days of ReadyLinks, firmware configuration was as simple as setting a convenient maintenance window for your network, such as late at night on a weekend. As ReadyLinks has grown alongside its customer base, it has introduced more advanced controls for customers who need them while preserving the simplicity of cloud-based delivery. Customers can now manage firmware across their organization by choosing which firmware version runs on each network.
Firmware Conventions
General Firmware Best Practices
ReadyLinks was founded on the promise of making device management intuitive, and this commitment extends to ReadyLinks firmware management. With the power of the ReadyLinks dashboard, we deliver high-quality firmware that provides access to cutting-edge features and secure, reliable software. Out of the box, we recommend leveraging the simple, automatic, and seamless update process. By default, your devices will be scheduled for updates as new firmware becomes available—firmware that undergoes rigorous validation and testing before deployment.
ReadyLinks' default firmware settings include:
- No automatic beta firmware deployments
- A default upgrade window
- A standard upgrade day of Wednesdays
On average, ReadyLinks releases new firmware for each product family once per quarter. This steady cadence ensures you receive new features and functionalities promptly while minimizing significant changes between versions to maintain software quality.
Staged Upgrades
For large-scale, enterprise networks, it's recommended to roll-out new firmware in phase to minimize network disruption and guarantee stability. It’s always important to consider the topology of your switches as, when you drive closer to the network core and away from the access layer, the risk during a firmware upgrade increases. Because of this, in a larger switch-based network you should always start the upgrade closest to the access layer. The high-level process for a switch upgrade involves the following:
- The switch downloads the new firmware (time varies depending on your connection, typically 8-10 minutes)
- The switch reboots with its new firmware (about a minute)
- Network protocols reconverge (varies depending on configuration)
-
Staging & Preparation
This guide provides instructions on how to deploy ReadyLinks devices. The cloud architecture provides an incredibly powerful sandbox and staging area without the need to ever unbox a single piece of hardware. This is mainly due to the fact that configuration changes and staging lives in the cloud until the device it is destined for checks in. This provides a broad array of new opportunities for streamlining new switch deployments as well as switch refreshes.
Before you begin
Login to ReadyView. If this is your first time, create a new account. Verify the firewall rules allow for the devices to communicate with your dashboard. Devices can be brought online and pre-provisioned prior to installation or pull their configuration at the time of installation. Create a configuration template for each ReadyLinks device model and automatically apply the template to devices as they come online and are adopted into your organization.
Bringing devices online
Here's how to bring your device online for the first time:
- Unbox your ReadyLinks device and power it on
- Assign an IP address to the ReadyLinks device
- Claim your device to your ReadyView dashboard
Note: You will need an uplink to the Internet for your devices with valid upstream firewall rules configured so they can talk to the ReadyLinks cloud.
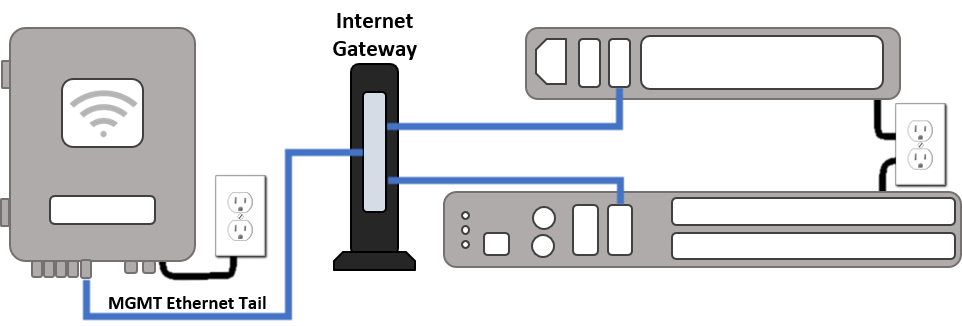

Each ReadyLinks device comes with a standard Ethernet uplink (WAN) facing port. Plug this port into your Internet gateway and follow the steps below to claim and manage your device.